情境
在看這篇文章之前,你可能需要了解一下以下的內容
如何使用ListView
如何使用Menu
如何使用AlertDialog
如何動態增減自訂ListView
這樣可能會比較容易理解本篇文章
在如何寫一個記事本中, 其實有一個很大的缺點,
就是當你離開程式以後, 我們所打的資料全部都消失了。

因此,我們需要一個儲存的程式來幫我們把資料存起來,
Android提供好幾種方式來儲存,
其中SharedPreferences 就是其中的一種,
但是,如果是不確定長度或大小的資料,
建議還是使用資料庫來存取。
完整程式碼
在一開始我們會先把完整程式碼呈現出來
只需要開啟新專案以後
複製貼上到相對應的位置就可以看到執行結果
MainActivity.java部分
public class MainActivity extends AppCompatActivity {
    private EditText inputText;
    private ListView listInput;
    private NoteDBHelper helper;
    private Cursor cursor;
    private SimpleCursorAdapter cursorAdapter;
    private List<String> option;
    @Override
    protected void onCreate(Bundle savedInstanceState) {
        super.onCreate(savedInstanceState);
        setContentView(R.layout.activity_main);
        initDB();
        initView();
    }

    private void initDB(){
        helper = new NoteDBHelper(getApplicationContext());
        cursor = helper.select();
        listInput = (ListView)findViewById(R.id.listInputText);
        cursorAdapter = new SimpleCursorAdapter(this,
            R.layout.adapter, cursor,
            new String[]{"item_text"},
            new int[]{R.id.text},
                SimpleCursorAdapter.FLAG_REGISTER_CONTENT_OBSERVER
        );
    }

    private void initView(){
        option = new ArrayList<>();
        option.add(getApplicationContext().getString(R.string.modify));
        option.add(getString(R.string.delete));
        inputText = (EditText)findViewById(R.id.inputText);
        listInput = (ListView)findViewById(R.id.listInputText);
        listInput.setAdapter(cursorAdapter);
        listInput.setOnItemLongClickListener(new AdapterView.OnItemLongClickListener() {
            @Override
            public boolean onItemLongClick(AdapterView<?> arg0, View view, int position, long id) {
                final int pos = position;
                cursor.moveToPosition(1);
                new AlertDialog.Builder(MainActivity.this)
                    .setItems(option.toArray(new String[option.size()]), new DialogInterface.OnClickListener() {
                        @Override
                        public void onClick(DialogInterface dialog, int which) {
                            switch (which) {
                                case 0://modify
                                    final View item = LayoutInflater.from(MainActivity.this).inflate(R.layout.item_layout, null);
                                    final EditText editText = (EditText) item.findViewById(R.id.edittext);
                                    editText.setText(cursor.getString(1));
                                    new AlertDialog.Builder(MainActivity.this)
                                        .setTitle("修改數值")
                                        .setView(item)
                                        .setPositiveButton("修改", new DialogInterface.OnClickListener() {
                                            @Override
                                            public void onClick(DialogInterface dialog, int which) {
                                                helper.update(cursor.getInt(0), editText.getText().toString());
                                                cursor.requery();
                                                cursorAdapter.notifyDataSetChanged();
                                            }
                                        })
                                            .show();
                                    break;
                                case 1://delete
                                    new AlertDialog.Builder(MainActivity.this)
                                        .setTitle("刪除列")
                                        .setMessage("你確定要刪除?")
                                        .setPositiveButton("是", new DialogInterface.OnClickListener() {

                                            @Override
                                            public void onClick(DialogInterface dialog, int which) {
                                                helper.delete(cursor.getInt(0));
                                                cursor.requery();
                                                cursorAdapter.notifyDataSetChanged();
                                            }
                                        })
                                        .setNegativeButton("否", new DialogInterface.OnClickListener() {

                                            @Override
                                            public void onClick(DialogInterface dialog, int which) {

                                            }
                                        })
                                        .show();
                                    break;
                            }

                        }
                    }).show();
                return false;
            }

        });
    }

    @Override
    public boolean onCreateOptionsMenu(Menu menu) {
        menu.add(Menu.NONE, Menu.FIRST, Menu.NONE, "新增");
        menu.add(Menu.NONE, Menu.FIRST + 1, Menu.NONE, "離開程式");
        return super.onCreateOptionsMenu(menu);
    }

    @Override
    public boolean onOptionsItemSelected(MenuItem item) {
        switch (item.getItemId()) {
            case Menu.FIRST://add new item
                if(!inputText.getText().toString().equals("")){
                    helper.insert(inputText.getText().toString());
                    cursor.requery();
                    cursorAdapter.notifyDataSetChanged();
                    inputText.setText("");
                }
                break;
            case Menu.FIRST + 1://exit app
                new AlertDialog.Builder(MainActivity.this)
                    .setTitle("離開此程式")
                    .setMessage("你確定要離開?")
                    .setPositiveButton("是", new DialogInterface.OnClickListener() {

                        @Override
                        public void onClick(DialogInterface dialog, int which) {
                            finish();
                        }
                    })
                    .setNegativeButton("否", new DialogInterface.OnClickListener() {

                        @Override
                        public void onClick(DialogInterface dialog, int which) {
                        }
                    })
                    .show();
                break;
        }
        return super.onOptionsItemSelected(item);
    }
}
在這邊會發現缺少adapter.xml
<?xml version="1.0" encoding="utf-8"?>
<LinearLayout xmlns:android="http://schemas.android.com/apk/res/android"
    android:orientation="vertical" android:layout_width="match_parent"
    android:layout_height="match_parent">
    <TextView
        android:id="@+id/text"
        android:textColor="#000000"
        android:textSize="20sp"
        android:gravity="center_vertical"
        android:layout_width="match_parent"
        android:layout_height="30dp" />
</LinearLayout>
以及alertdialog的layout
<?xml version="1.0" encoding="utf-8"?>
<LinearLayout
    xmlns:android="http://schemas.android.com/apk/res/android"
    android:orientation="vertical"
    android:layout_width="match_parent"
    android:layout_height="match_parent">
    <EditText
        android:layout_width="match_parent"
        android:layout_height="match_parent"
        android:id="@+id/edittext" />
</LinearLayout>
建立一個新類別叫做NoteDBHelper.java
並且複製貼上以下的內容
public class NoteDBHelper extends SQLiteOpenHelper {

    private final static String DATABASE_NAME = "note_database";
    private final static int DATABASE_VERSION = 1;
    private final static String TABLE_NAME = "note_table";
    private final static String FEILD_ID = "_id";
    private final static String FEILD_TEXT = "item_text";
    private String sql =
            "CREATE TABLE IF NOT EXISTS "+TABLE_NAME+"("+
                    FEILD_ID+" INTEGER PRIMARY KEY AUTOINCREMENT,"+
                    FEILD_TEXT+" TEXT"+
                    ")";
    private SQLiteDatabase database;
    public NoteDBHelper(Context context) {
        super(context, DATABASE_NAME, null, DATABASE_VERSION);
        database = this.getWritableDatabase();
    }

    @Override
    public void onCreate(SQLiteDatabase db) {
        db.execSQL(sql);
    }

    @Override
    public void onUpgrade(SQLiteDatabase db, int oldVersion, int newVersion) {
        onCreate(db);
    }

    public Cursor select(){
        Cursor cursor = database.query(TABLE_NAME, null, null, null, null, null, null);
        return cursor;
    }

    public void insert(String itemText){
        ContentValues values = new ContentValues();
        values.put(FEILD_TEXT, itemText);
        database.insert(TABLE_NAME, null, values);
    }

    public void delete(int id){
        database.delete(TABLE_NAME, FEILD_ID + "=" + Integer.toString(id), null);
    }

    public void update(int id, String itemText){
        ContentValues values = new ContentValues();
        values.put(FEILD_TEXT, itemText);
        database.update(TABLE_NAME, values, FEILD_ID + "=" + Integer.toString(id), null);
    }

    public void close(){
        database.close();
    }
}
程式碼說明
因為我們在記事本這隻程式加上了儲存的功能,
我們先宣告一個ListViewDBHelper的類別,並且繼承SQLiteOpenHelper,
你就會看到覆寫兩個方法
public class NoteDBHelper extends SQLiteOpenHelper {

    public NoteDBHelper(Context context, String name, SQLiteDatabase.CursorFactory factory, int version) {
        super(context, name, factory, version);
    }

    @Override
    public void onCreate(SQLiteDatabase db) {

    }

    @Override
    public void onUpgrade(SQLiteDatabase db, int oldVersion, int newVersion) {

    }
}
接著我們就將這個類別改成這樣
public class NoteDBHelper extends SQLiteOpenHelper {

    private final static String DATABASE_NAME = "note_database";
    private final static int DATABASE_VERSION = 1;
    private final static String TABLE_NAME = "note_table";
    private final static String FEILD_ID = "_id";
    private final static String FEILD_TEXT = "item_text";
    private String sql =
            "CREATE TABLE IF NOT EXISTS "+TABLE_NAME+"("+
                    FEILD_ID+" INTEGER PRIMARY KEY AUTOINCREMENT,"+
                    FEILD_TEXT+" TEXT"+
                    ")";
    private SQLiteDatabase database;
    public NoteDBHelper(Context context) {
        super(context, DATABASE_NAME, null, DATABASE_VERSION);
        database = this.getWritableDatabase();
    }

    @Override
    public void onCreate(SQLiteDatabase db) {
        db.execSQL(sql);
    }

    @Override
    public void onUpgrade(SQLiteDatabase db, int oldVersion, int newVersion) {
        onCreate(db);
    }
}
首先,我們會宣告資料庫的名稱(DATABASE_NAME)、資料庫版本(DATABASE_VERSION),這個是建構子所必須傳給父類別的,
而由於我們的Helper是在這個類別處理,而不是由外部類別來控制,
因此我們將建構子改成只需要傳入Context這個參數即可。
接著我們必須宣告資料庫的表格名稱(TABLE_NAME),以及每一個欄位的變數(FEILD_ID、FEILD_TEXT),這樣方便我們之後再下SQL存取。
然後我們宣告一個database的變數(database),這個變數是SQLiteDatabase的物件,
它是專門在幫我們處理資料庫內的一些指令,如:SELECT、INSERT、DELETE…等等。
這個物件已經將這些指令寫好方法,只要我們照著方法傳入正確的參數,
就可以執行資料庫指令了。
所以我們一開始就先下第一個指令(sql),讓資料庫能夠幫我們先建立好一個表格,
如果這個表格存在的話,就不會再建立一次。
之後表格就會像這樣延伸下去,其中id必須命名為 _id,否則會跳出錯誤訊息。
假設有三筆資料就會呈現這樣:
| _id | text |
|---|---|
| 1 | Give me pass |
| 2 | Let me pass |
| 3 | We are all pass |
當這個類別一開始執行,會先跳進onCreate來執行剛剛我們所下的SQL,
之後如果表格有變動,則會跳進onUpgrade這個方法。
接著我們就加入一些方法,首先我們先加入最基本的查詢方法,
public Cursor select(){
    Cursor cursor = database.query(TABLE_NAME, null, null, null, null, null, null);
    return cursor;
}
由於我們使用query只傳入第一個參數,因此它會把表格內所有的欄位全部回傳出來,
然後丟進Cursor裡面,因此我們就照著它內建的方法,
一樣回傳一個Cursor出去。
Cursor是一個指標,假設你有一筆3*3的資料表格,假設長這樣
| id | name | text |
|---|---|---|
| 1 | john | Give me pass |
| 2 | mary | Let me pass |
| 3 | honey | We are all pass |
一開始你可以指定要讓它跑到那一列?
例如你下
cursor.moveToPosition(0); 那麼它就會跑到第一列 john那邊, 接著你根據你欄位的資料格式,
就可以取出表格內的資料,
例如 你想要取出第二個欄位mary這個名字,
由於name這個欄位是由String所構成的,所以你可以這樣
cursor.moveToPosition(1);
cursor.getString(1);
這樣就會回傳一個字串,內容是mary。
如果你想要取得honey的id, 則你就可以這樣
cursor.moveToPosition(2);
cursor.getInt(0);
這樣就會回傳一個數字, 內容是3。
接著我們來寫insert方法
public void insert(String itemText){
    ContentValues values = new ContentValues();
    values.put(FEILD_TEXT, itemText);
    database.insert(TABLE_NAME, null, values);
}
這個方法需要傳入ContentValues的物件,
他是一個對應的物件,可以告訴資料庫,你想要插入(欄位/資料),
由於我們只設定兩個欄位,而第一個欄位是自動增加的id,
因此我們只需要加入一個參數即可。
delete方法
public void delete(int id){
    database.delete(TABLE_NAME, FEILD_ID+"="+Integer.toString(id), null);
}
這個方法很簡單,如果你熟悉SQL,第二個參數就是WHERE語句,
至於第三個參數,當你where語句後面接得條件非常多的時候,
你就可以使用第三個參數來調整,視個人習慣,
由於我的條件只有一個,所以我直接塞進第二個參數內。
如果要使用第三個參數,其實也不難,
例如你要找尋id=1 and name=”mary”, 則你可以這樣寫
database.delete(TABLE_NAME, FEILD_ID+"=? AND "+FEILD_NAME+"=?", new String[]{"1","mary"});update方法
public void update(int id, String itemText){
    ContentValues values = new ContentValues();
    values.put(FEILD_TEXT, itemText);
    database.update(TABLE_NAME, values, FEILD_ID+"="+Integer.toString(id), null);
}
跟前面相同。
最後一個close方法
public void close(){
    database.close();
}
資料庫用完記得關起來喔!
這樣就大致上介紹完資料庫的基本指令,當中變化可以根據自己的方式來作修改。
接下來我們回到之前筆記本觀察一下,
首先我們必須在onCreate裡面宣告help的物件,
private ListViewDBHelper helper;
helper = new ListViewDBHelper(getApplicationContext());
接著我們就先把資料庫有的東西先搜尋出來,
如果資料裡面有我們之前存的資料,則丟進ListView裡面
private void initDB(){
    helper = new NoteDBHelper(getApplicationContext());
    cursor = helper.select();
    listInput = (ListView)findViewById(R.id.listInputText);
    cursorAdapter = new SimpleCursorAdapter(this,
        R.layout.adapter, cursor,
        new String[]{"item_text"},
        new int[]{R.id.text}
    );
}
Android裡面有內建一個可以容納Cursor的Adapter,
但是你必須在宣告一個View讓這個Adapter放,
xml
<?xml version="1.0" encoding="utf-8"?>
<LinearLayout xmlns:android="http://schemas.android.com/apk/res/android"
    android:orientation="vertical" android:layout_width="match_parent"
    android:layout_height="match_parent">
    <TextView
        android:id="@+id/text"
        android:layout_width="wrap_content"
        android:layout_height="wrap_content" />
</LinearLayout>
當我們按下menu的時候,會跳出兩個選項,
一個是增加記事,另外一個是離開程式
我們只需要修改增加記事的部份
當按下Add, 我們就讓help去呼叫insert方法。
@Override
public boolean onOptionsItemSelected(MenuItem item) {
switch (item.getItemId()) {
case Menu.FIRST://add new item
if(!inputText.getText().toString().equals("")){
helper.insert(inputText.getText().toString());
cursor.requery();
cursorAdapter.notifyDataSetChanged();
inputText.setText("");
}
break;
case Menu.FIRST + 1://exit app
new AlertDialog.Builder(MainActivity.this)
.setTitle("離開此程式")
.setMessage("你確定要離開?")
.setPositiveButton("是", new DialogInterface.OnClickListener() {
@Override
public void onClick(DialogInterface dialog, int which) {
finish();
}
})
.setNegativeButton("否", new DialogInterface.OnClickListener() {
@Override
public void onClick(DialogInterface dialog, int which) {
}
})
.show();
break;
}
return super.onOptionsItemSelected(item);
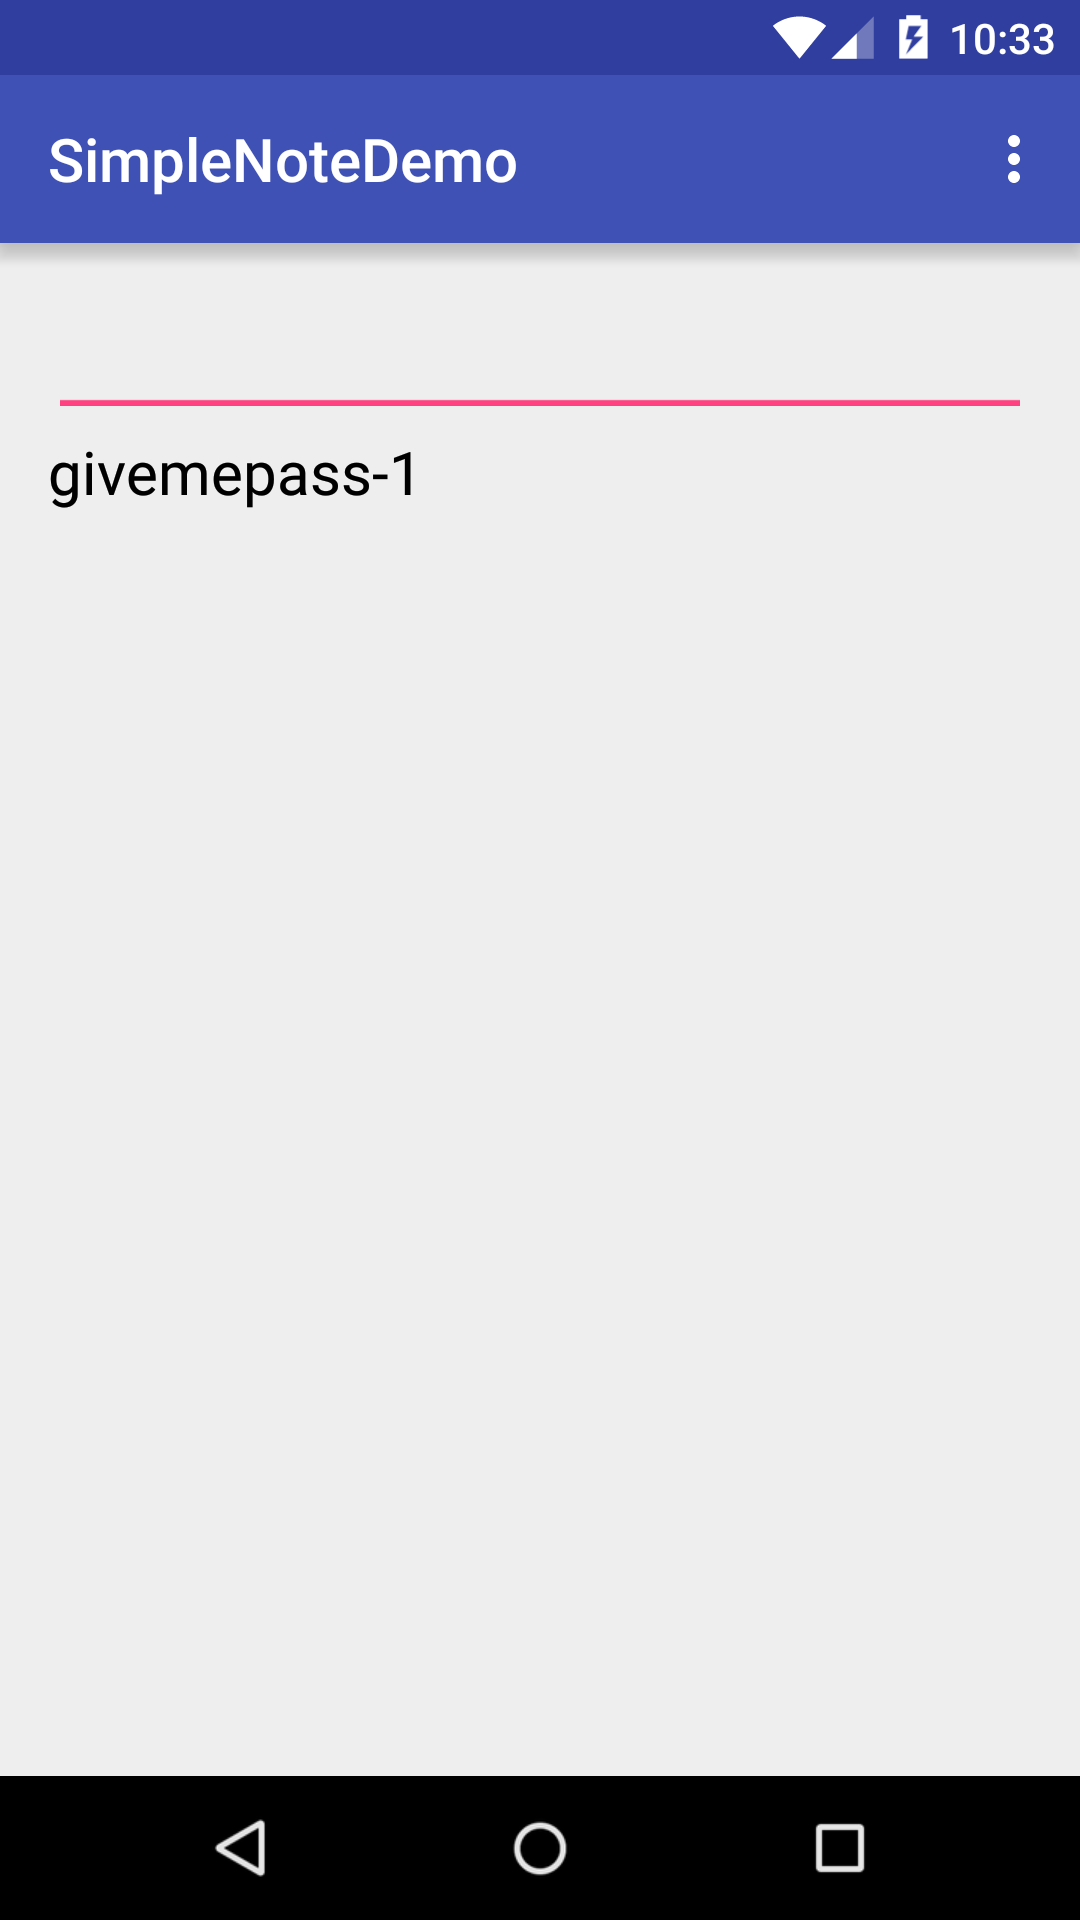
}如果要增加, 則呼叫insert就可以了, 並且清除掉輸入框。
helper.insert(inputText.getText().toString());
cursor.requery();
cursorAdapter.notifyDataSetChanged();
inputText.setText("");
按下新增, 則會加入到下方的listview

按下離開程式,

再進來會發現資料都還在, 代表我們資料成功寫進資料庫了。

再來建立好選項字串 就可以丟到ListView內來進行長按的功能
option = new ArrayList<>();
option.add(getApplicationContext().getString(R.string.modify));
option.add(getString(R.string.delete));
inputText = (EditText)findViewById(R.id.inputText);
listInput = (ListView)findViewById(R.id.listInputText);
listInput.setAdapter(cursorAdapter);
長按有兩個功能, 一個是修改, 一個是刪除
我們利用如何使用AlertDialog的ListDialog來進行選項操作, 首先是修改部分
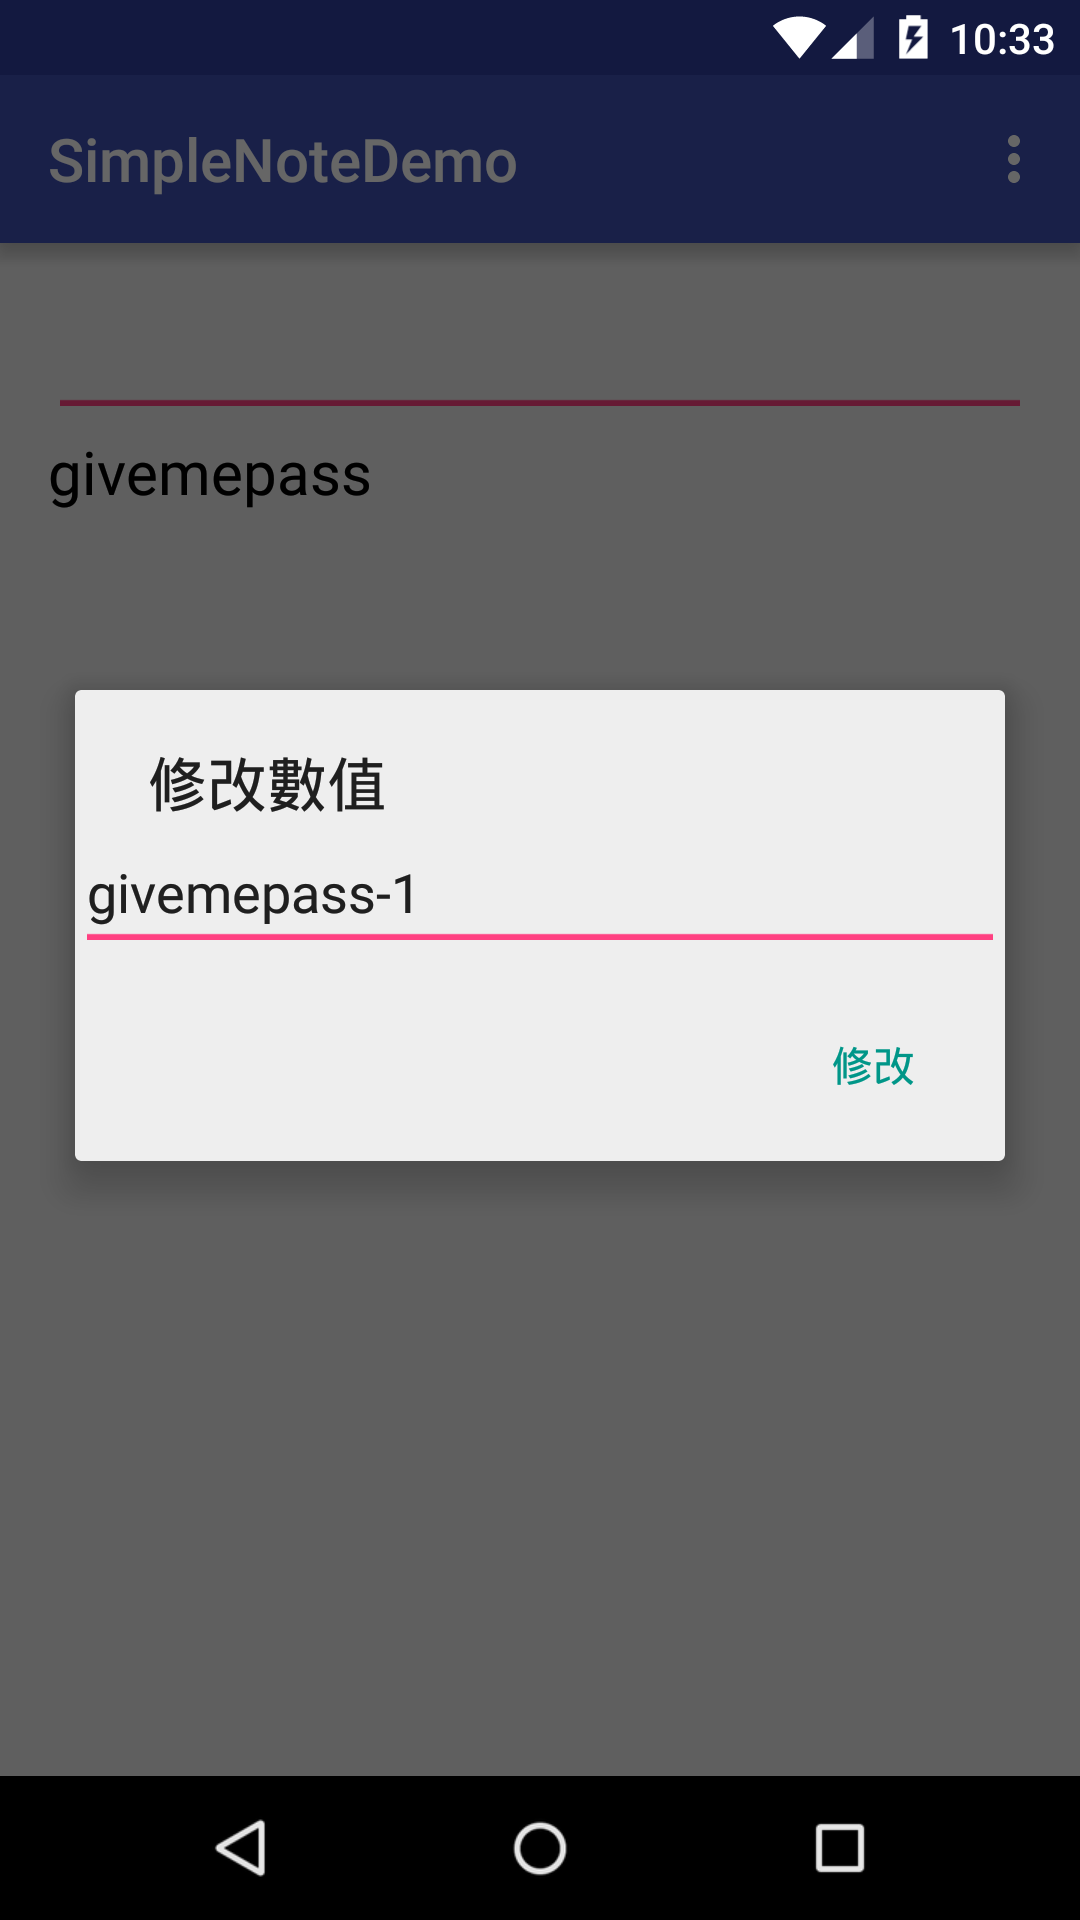
case 0://modify
   final View item = LayoutInflater.from(MainActivity.this).inflate(R.layout.item_layout, null);
    final EditText editText = (EditText) item.findViewById(R.id.edittext);
    editText.setText(cursor.getString(1));
    new AlertDialog.Builder(MainActivity.this)
        .setTitle("修改數值")
        .setView(item)
        .setPositiveButton("修改", new DialogInterface.OnClickListener() {
            @Override
            public void onClick(DialogInterface dialog, int which) {
                helper.update(cursor.getInt(0), editText.getText().toString());
                cursor.requery();
                cursorAdapter.notifyDataSetChanged();
            }
        })
        .show();
    break;
可以看到我們利用cursor從db撈出所點選item的文字資料, 並且呈現在EditText上面, 就可以進行修改,
當我們按下修改按鈕的時候, 就可以利用Helper的update方法去更改, 並且再重新撈一次db且更新adapter即可。

刪除的操作跟編輯的操作大同小異
case 1://delete
   new AlertDialog.Builder(MainActivity.this)
       .setTitle("刪除列")
       .setMessage("你確定要刪除?")
       .setPositiveButton("是", new DialogInterface.OnClickListener() {

           @Override
           public void onClick(DialogInterface dialog, int which) {
               helper.delete(cursor.getInt(0));
               cursor.requery();
               cursorAdapter.notifyDataSetChanged();
           }
       })
       .setNegativeButton("否", new DialogInterface.OnClickListener() {

           @Override
           public void onClick(DialogInterface dialog, int which) {

           }
       })
       .show();
   break;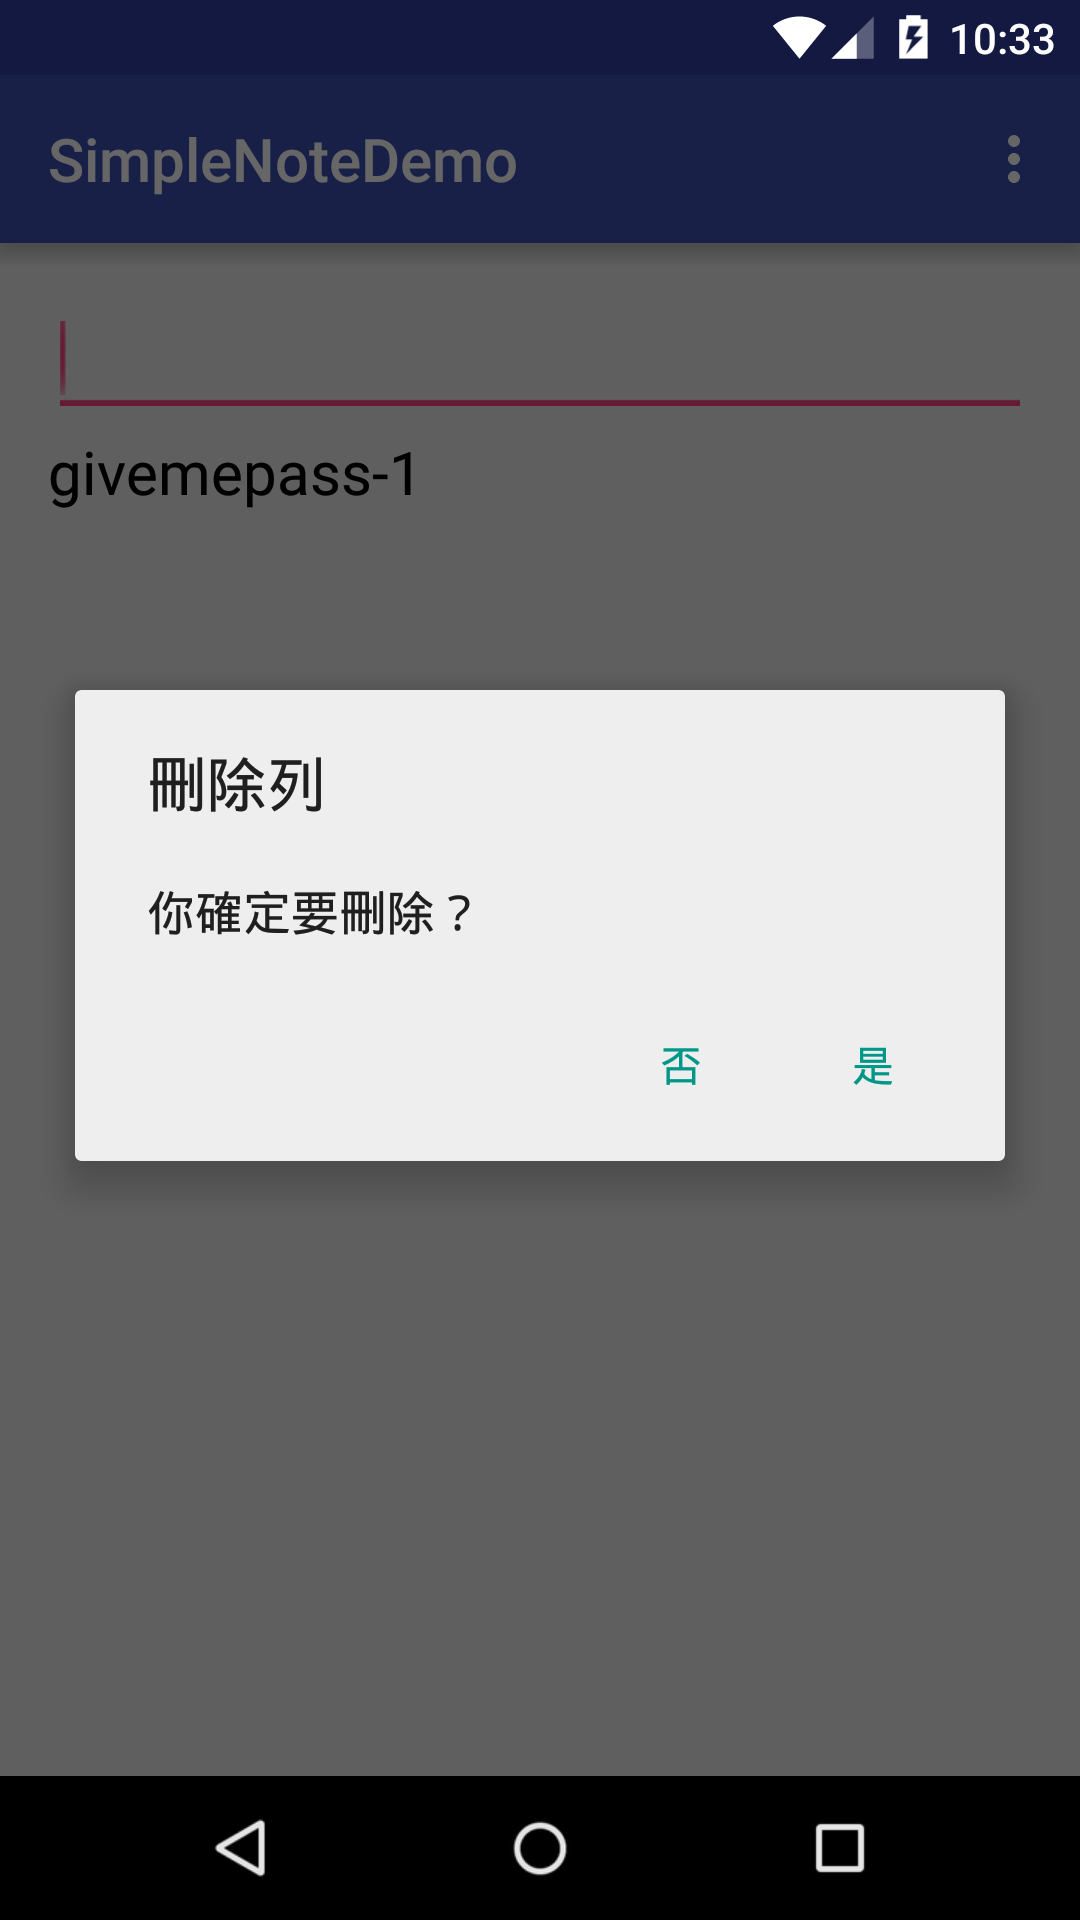
修改只要呼叫update方法,
helper.update(cursor.getInt(0), inputText.getText().toString());
cursor.requery();
刪除只要呼叫delete方法,
helper.delete(cursor.getInt(0));
cursor.requery();
listInput.setAdapter(adapter);
最後當程式結束的時候,把資料庫關閉
@Override
protected void onDestroy() {
    helper.close();
    super.onDestroy();
}
這樣一個簡單的筆記本就大致上完成。